Resonator guitar
Positioning of the contact microphone

- As a reminder, it is important to properly prepare your contact microphone for installation, do not hesitate to reread the advice below depending on your model:
- Original C1 contact microphone preparation page
- C2 and C3 contact microphones preparation page
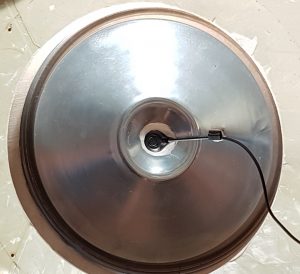
- We recommend placing the contact microphone preferably inside, in the center of the resonator.
- Remove the back cover, a small screw usually secures the resonator in the center. Cover it with a little bit of putty to avoid any interference or vibration, then place the microphone high enough with the putty so that it does not touch the screw.
- Make your first tests. Generally, the tonal balance is good between bass and treble.
- If in the center the sound is harsh or lacks bass, you can put the mic on the cone, closest to the center to start, then from the center outward.
- Adjust the compression if necessary. Refer to the preparation of your contact microphone to find out how to compress the sound.
- Your system is delivered to you with the high pass set to 360Hz, this is the default position, however if after determining the best placement for the string power balance you find that the sound lacks bass, then position the high pass on 180Hz. If you find that the sound still lacks depth in the bass, set it to Flat.
- If the sound is too bright, try resting the mic in the same spot with the gray putty for a duller sound in the highs and rounder in the bass.
- The microphone can also be placed under the strings on the bridge stand on the outside of the instrument, if the height of the strings allows it. Place it in the center, you can then seek to refine the tonal balance by going more or less towards the bass or treble. You can also have a more dynamic sound towards the bridge and smoother towards the outside of the biscuit.

